Woodworker's Journal 2004 Summer, страница 41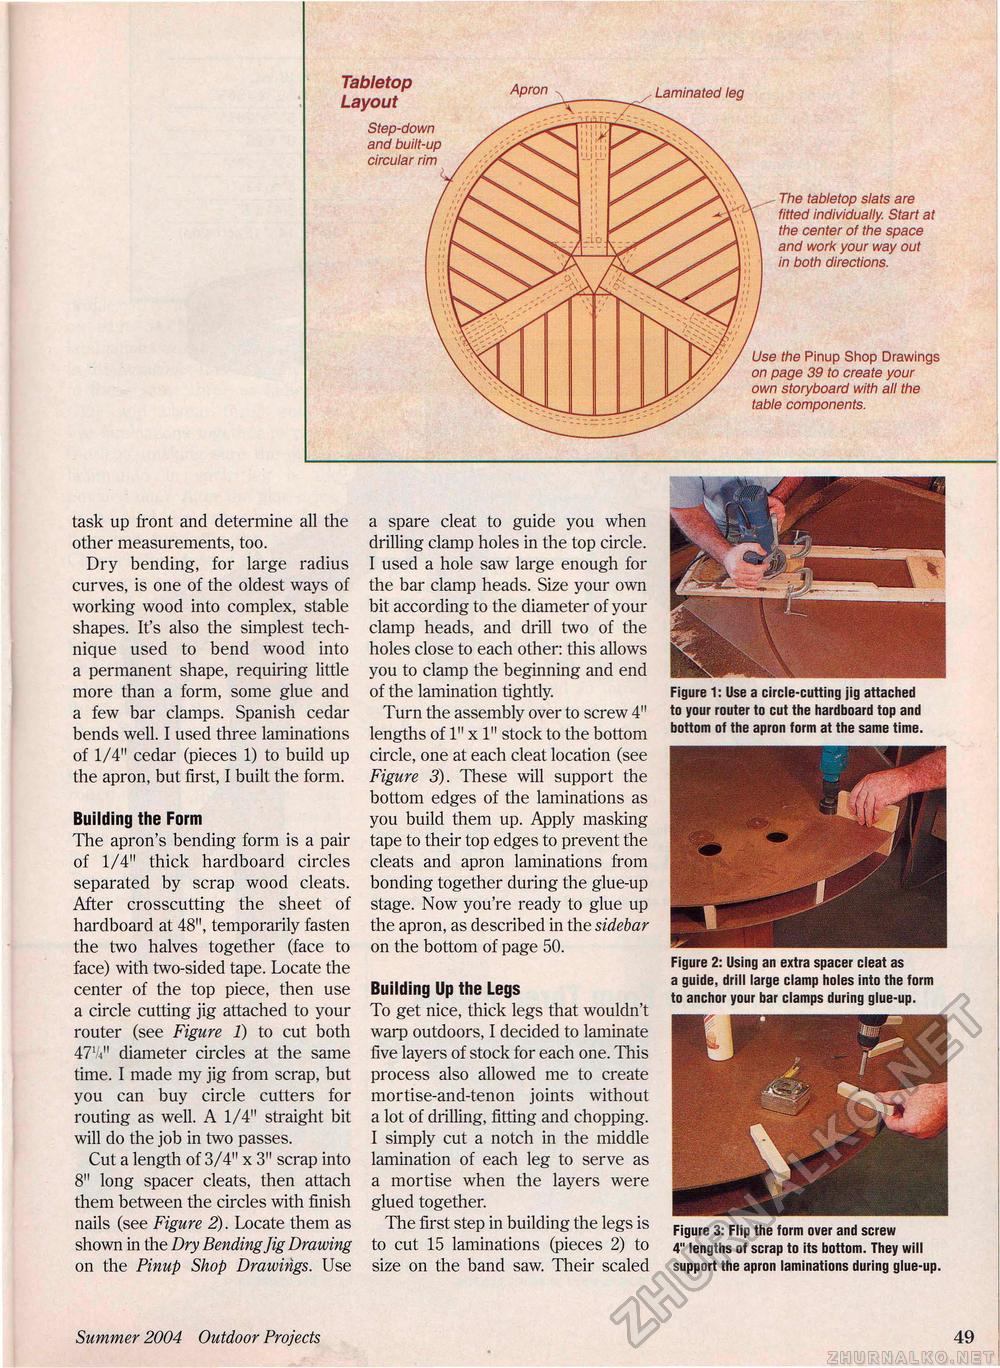
task up front and determine all the other measurements, too. Dry bending, for large radius curves, is one of the oldest ways of working wood into complex, stable shapes. It's also the simplest technique used to bend wood into a permanent shape, requiring little more than a form, some glue and a few bar clamps. Spanish cedar bends well. I used three laminations of 1/4" cedar (pieces 1) to build up the apron, but first, I built the form. Building the Form The apron's bending form is a pair of 1/4" thick hardboard circles separated by scrap wood cleats. After crosscutting the sheet of hardboard at 48", temporarily fasten the two halves together (face to face) with two-sided tape. Locate the center of the top piece, then use a circle cutting jig attached to your router (see Figure 1) to cut both 47V411 diameter circles at the same time. I made my jig from scrap, but you can buy circle cutters for routing as well. A 1/4" straight bit will do the job in two passes. Cut a length of 3/4" x 3" scrap into 8" long spacer cleats, then attach them between the circles with finish nails (see Figure 2). Locate them as shown in the Dry Bending Jig Drawing on the Pinup Shop Drawings. Use Summer 2004 Outdoor Projects a spare cleat to guide you when drilling clamp holes in the top circle. I used a hole saw large enough for the bar clamp heads. Size your own bit according to the diameter of your clamp heads, and drill two of the holes close to each other: this allows you to clamp the beginning and end of the lamination tightly. Turn the assembly over to screw 4" lengths of 1" x 1" stock to the bottom circle, one at each cleat location (see Figure 3). These will support the bottom edges of the laminations as you build them up. Apply masking tape to their top edges to prevent the cleats and apron laminations from bonding together during the glue-up stage. Now you're ready to glue up the apron, as described in the sidebar on the bottom of page 50. Building Up the Legs To get nice, thick legs that wouldn't warp outdoors, I decided to laminate five layers of stock for each one. This process also allowed me to create mortise-and-tenon joints without a lot of drilling, fitting and chopping. I simply cut a notch in the middle lamination of each leg to serve as a mortise when the layers were glued together. The first step in building the legs is to cut 15 laminations (pieces 2) to size on the band saw. Their scaled Figure 1: Use a circle-cutting jig attached to your router to cut the hardboard top and bottom of the apron form at the same time. Figure 2: Using an extra spacer cleat as a guide, drill large clamp holes into the form to anchor your bar clamps during glue-up. Figure 3: Flip the form over and screw 4" lengths of scrap to its bottom. They will support the apron laminations during glue-up. 49 Tabletop Layout Step-down and built-up circular rim Apron Laminated leg The tabletop slats are fitted individually. Start at the center of the space and work your way out in both directions. Use the Pinup Shop Drawings on page 39 to create your own storyboard with all the table components. |


